
VSCO Cam Subtle Fade M5 inspired Preset- how to create in Lightroom

Note: I have M5 has been rebranded and is now called Film Inspired Soft Fade - I am no longer able to use the name 'VSCO inspired' due to copyright issues more info in this blog post.
VSCO : "The M Series: Subtle Fade pack evokes the vintage hues of the 70s and is available for purchase within your VSCO Cam photo app. These desaturated and mellow presets are ideal for urban environments and portraits."
I love the M5 for bright, high key scenes. It has this effect of creating a transparent feel to the image, as if you're looking at a projector slide. For lower key images, especially portraits, it has this rich warm vintage-y look which I've come to love too. If you've used VSCO M5 on photos of people you may have noticed that it can be a very flattering preset for skin tones. I also love the moody analogue film look it gives to landscapes and still life.
Note: I have M5 has been rebranded and is now called Film Inspired Soft Fade - I am no longer able to use the name VSCO due to copyright issues more info in this blog post.
The preset can be purchased at my preset shop

Like I tried to do with the VSCO Cam A6 preset- I wanted to take the qualities of VSCO Cam M5 preset and adapt those to Lightroom editing of higher resolution images. It isn't always an exact replica but I feel like I've been able to transfer most of the stylistic features.

Unedited Jpeg on the left, image edited in the VSCO Cam M5 preset on smartphone app.
In the VSCO Cam editing app on smartphones, there is an option to alter the 'strength' of the editing effect/filter in a slider- you can make a subtle edit or go full strength. This is great because some images look better with a more subtle change. This is why I've created 3 versions of the preset- M5 (regular), M5+ (increased effect with more fading, colour shifts, and selective desaturation), M5- (decreased effect).

Self portrait: (from top right and clockwise)- straight out of camera Jpeg, M5- edit (more subtle edit), M5 edit, M5+ edit (more exaggerated edit).

Above: left image is Jpeg straight out of camera, right image is Jpeg processed with VSCO Cam M5 preset.
VSCOCam M5 qualities:

VSCO Cam M5 inspired Lightroom edit from a raw file.
- The highlights are dropped and the blacks crushed to create the matte/faded effect. In the RGB tone curve I've dragged the highlights down (from the top right point on the curve), and the blacks up (from the bottom left point) to create faded highlights and shadows.
- Moderate amount of mid tone contrast. In Lightroom Tone Curves I used a slight S curve for each individual colour channel, as well as having an S curve in the centre of the RGB tone curve.
- Overall desaturation. In Lightroom, I’ve reduced the saturation and vibrance, less in the M5- version, more in the M5+ version.
- Reds are shifted towards orange and tangerine. In Lightroom, I’ve gone in the Hue slider and shifted the reds to orange red.
- Greens are shifted towards yellow tones. In Lightroom, I’ve gone in the Hue slider and shifted the blue greens to yellow green.
- Small amount of grain for a filmic texture. In the Grain sliders , I've dialled in 20 in 'amount', 18 in 'size' and 32 in 'roughness'.
- Skin tones are brightened and take on a creamy quality with crushed highlight details. This can be achieved in Lightroom with a combination of increasing the luminance of orange tones; decreasing the saturation of red, orange and yellow; using noise reduction as a way to smooth skin.
- There is a certain warm caramel tone to the midtones and shadows. It took me forever and a day to figure this out while preserving clean highlights but I've managed to get this effect in Lightroom by using the split toning panel to add yellow to the shadows and teal in the highlights to counteract the warm in the highlights.
I have this preset available to download in my preset shop, and also in a value bundle (SNC preset bundle Vol 1)

Above: left image is Jpeg straight out of camera, right image is Jpeg processed with VSCO Cam M5 preset.

Lightroom M5+ edit. I love the warm creamy tones it gives to beach scenes.


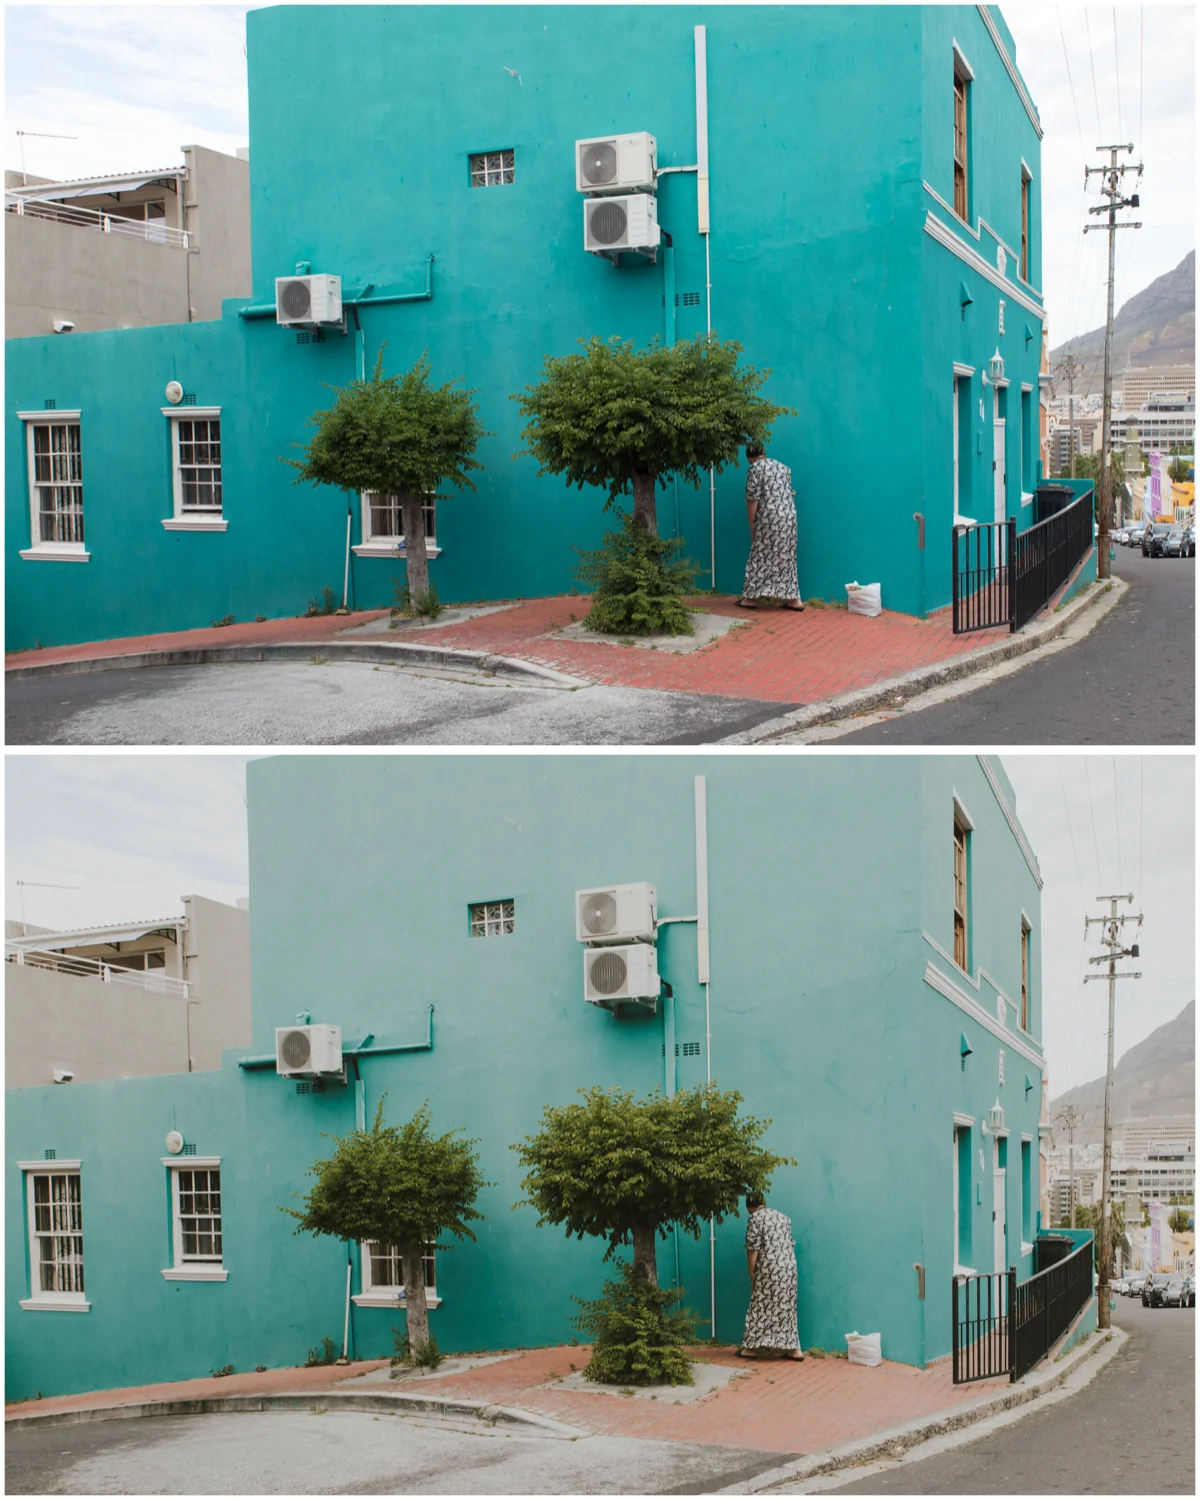
Before (top image), and after the Lightroom M5 preset


Looking down at the world from the top of the Andes Mountains. Top image is the original jpeg, bottom image is processed with my M5 Lightroom preset
M5 compared with some of the other VSCO presets I've come up with ....
Presets and value bundles available to download in my Etsy shop....


VSCO Cam inspired Lightroom Presets comparison: Unedited (top left), M5 (top right), SE3(bottom left), F2 (bottom right)
Hope you enjoyed the post!