
How to install and use Lightroom Presets: Part 1
I wrote this first post for all of my lovely Etsy store customers who were new to Lightroom and asked for help on how to use my presets.
The next blog post will be for those who are more familiar with Lightroom and want to be able to further customize these presets for different shooting situations, to suit individual personal styles/taste, and tweaking for more flattering skin tones in portraits.
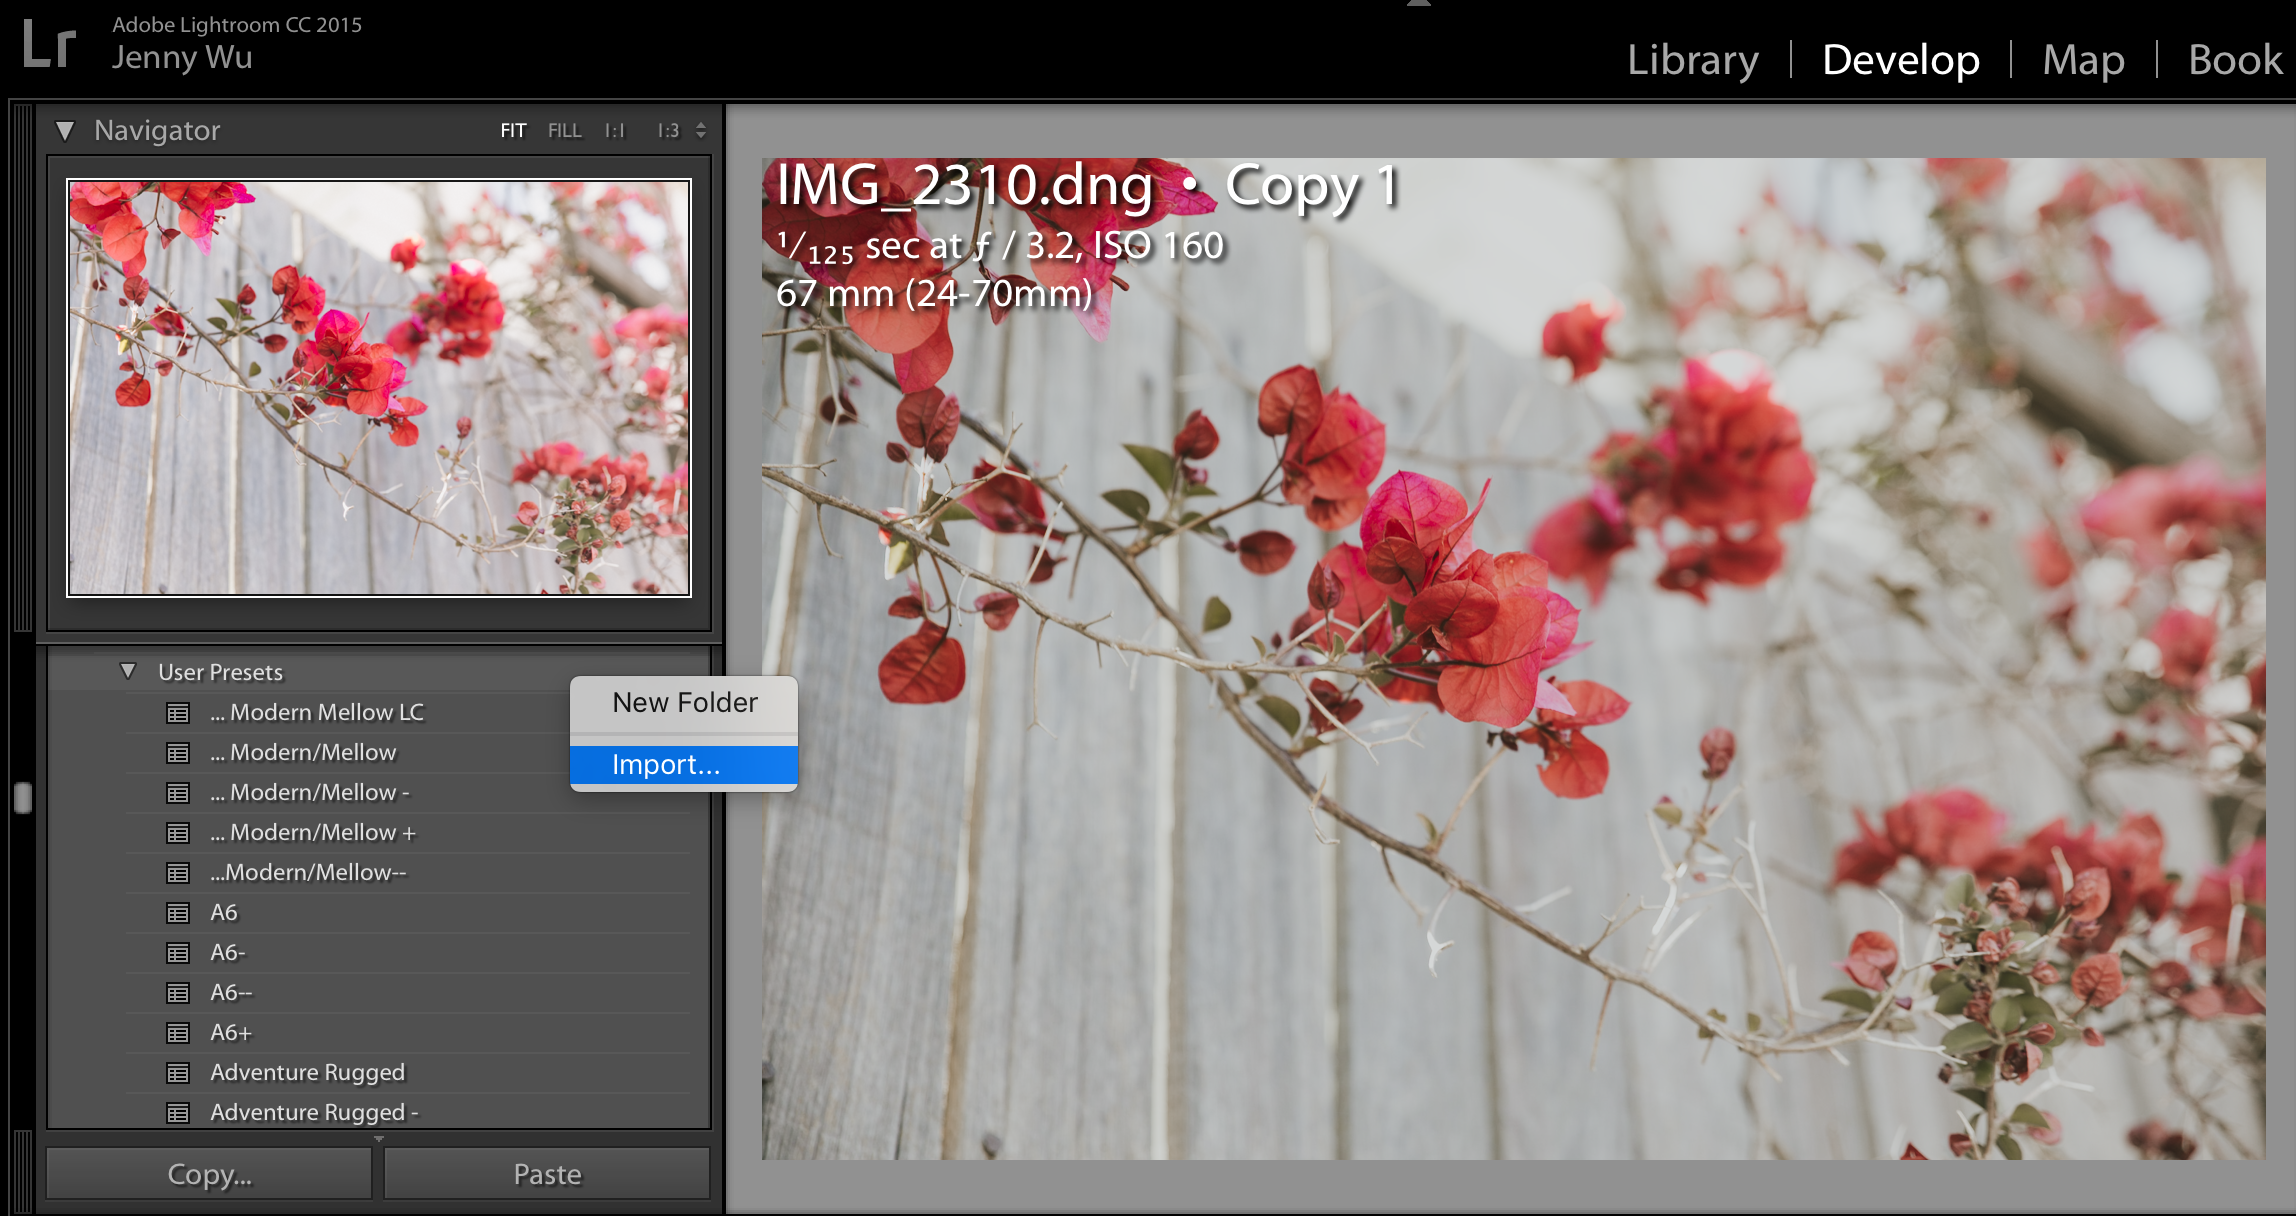
Installing presets
After downloading presets into your folder of choice, open Lightroom and go to the Develop module. On the left panel you will see the presets list.
Right-click on the folder you want to import the preset into. An option to create a new folder or import presets will come up. Click 'import', and it will allow you to find the folder in your computer- and it will automatically appear in the presets list. Easy!
BASIC FOUNDATION ADJUSTMENTS
Having a good starting point for editing is SO important.
When your image comes out of the camera exactly as you expect it- it is editing heaven, especially when you want to do the one click preset magic thing.
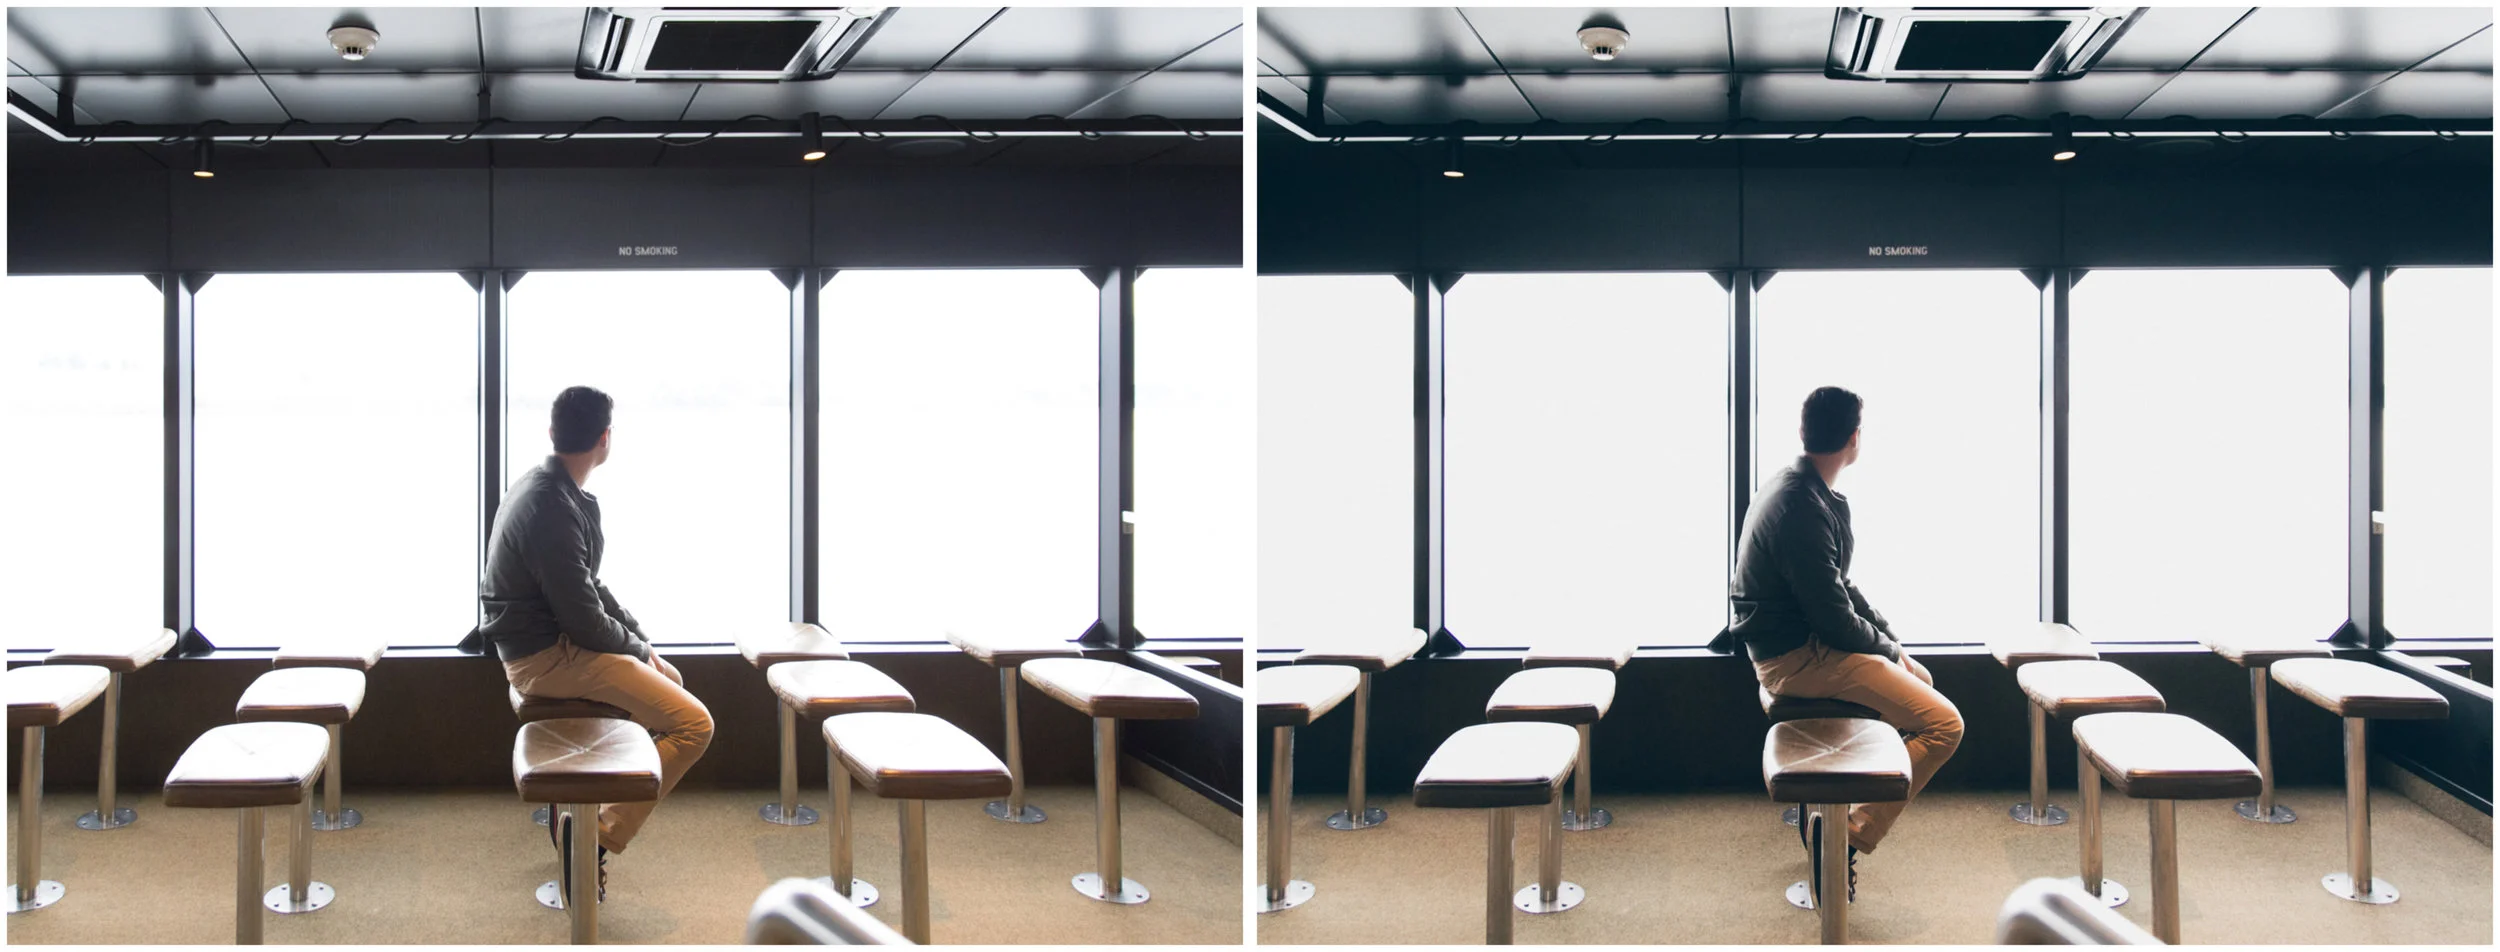
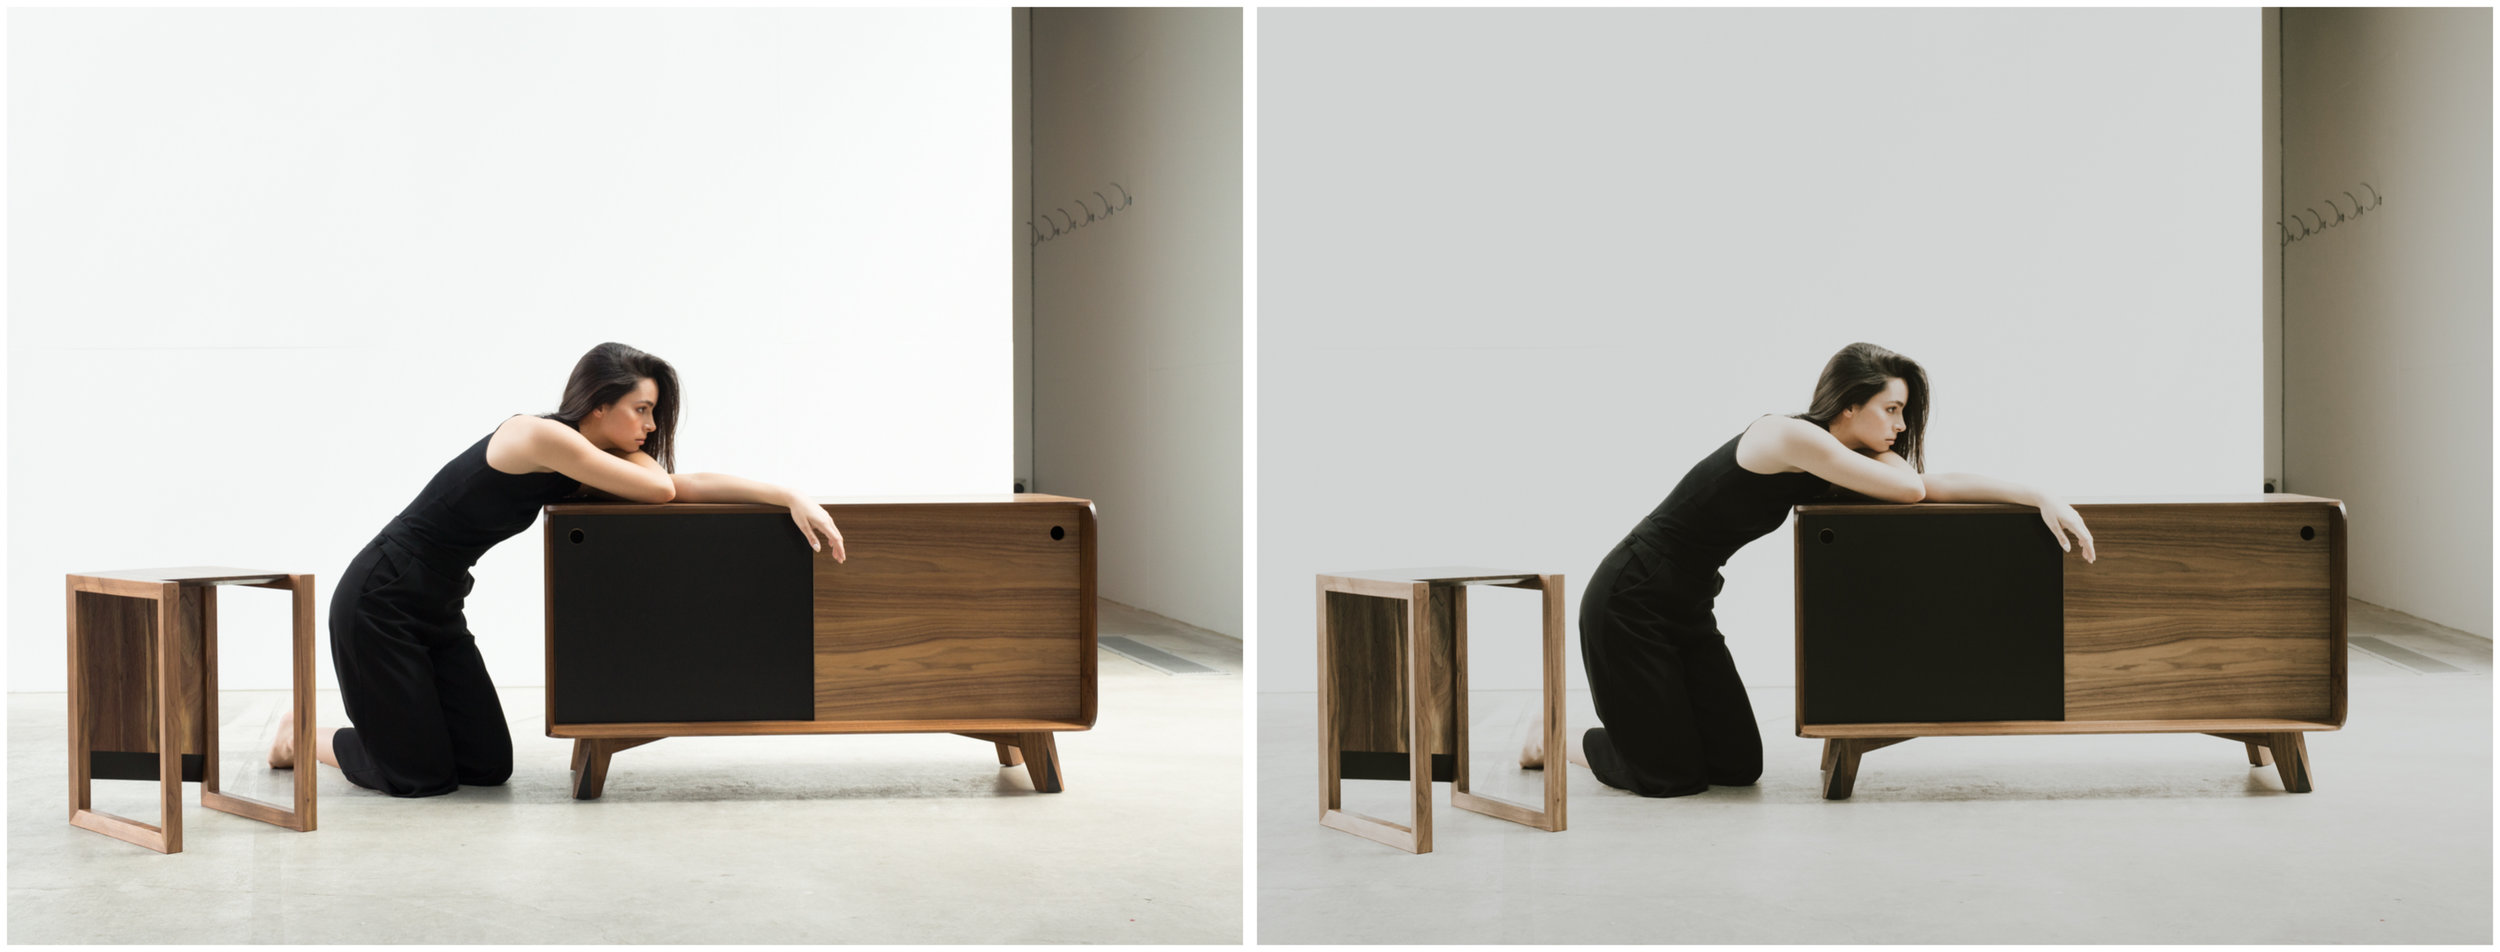
One click edit when colour balance and exposure is properly adjusted RAW (left), HB1 preset applied (right)
One click edit when colour balance and exposure is properly adjusted for the scene RAW (left), edited with Life//style Lightroom Preset (right)
However.
Exposure and colour balance straight out of camera is sometimes not we feel is 'right' for the image, however. Sometimes there is a colour cast from the shooting environment- green cast from grass, reddish cast from a brick wall, etc.
Sometimes we shoot underexposed either by accident due to fluctuating lighting- or sometimes intentionally like I do (to preserve details in the skin highlights).
What this means is that sometimes the preset is applied on an incorrectly exposed or colour balanced image, leading to results that aren't what we expected for that preset. Sometimes the image turns out looking muddy or more magenta that what we want (for that preset).
BASIC HOW-TO:
1. Get the exposure in the ballpark
2. Nail the colour balance (I find it sometimes easier to brighten the image before doing the colour balance to help with my judgement of the tones. It's easier than trying to figure it out in darker image initially)
3. Apply the preset. You might want to try the + or - versions for what you want.
4. Tweak exposure until it feels right to you for the particular image. Super important because sometimes presets will further brighten or darken the image, overshooting the point of where you want the exposure to be. (It has a lot to do with what the preset does with luminosity of individual colour channels, tone curves, and highlights/shadows)
Note: I always shoot in RAW and that is what my presets are designed for. Applying the presets to Jpegs will lead to unexpected results to the image.
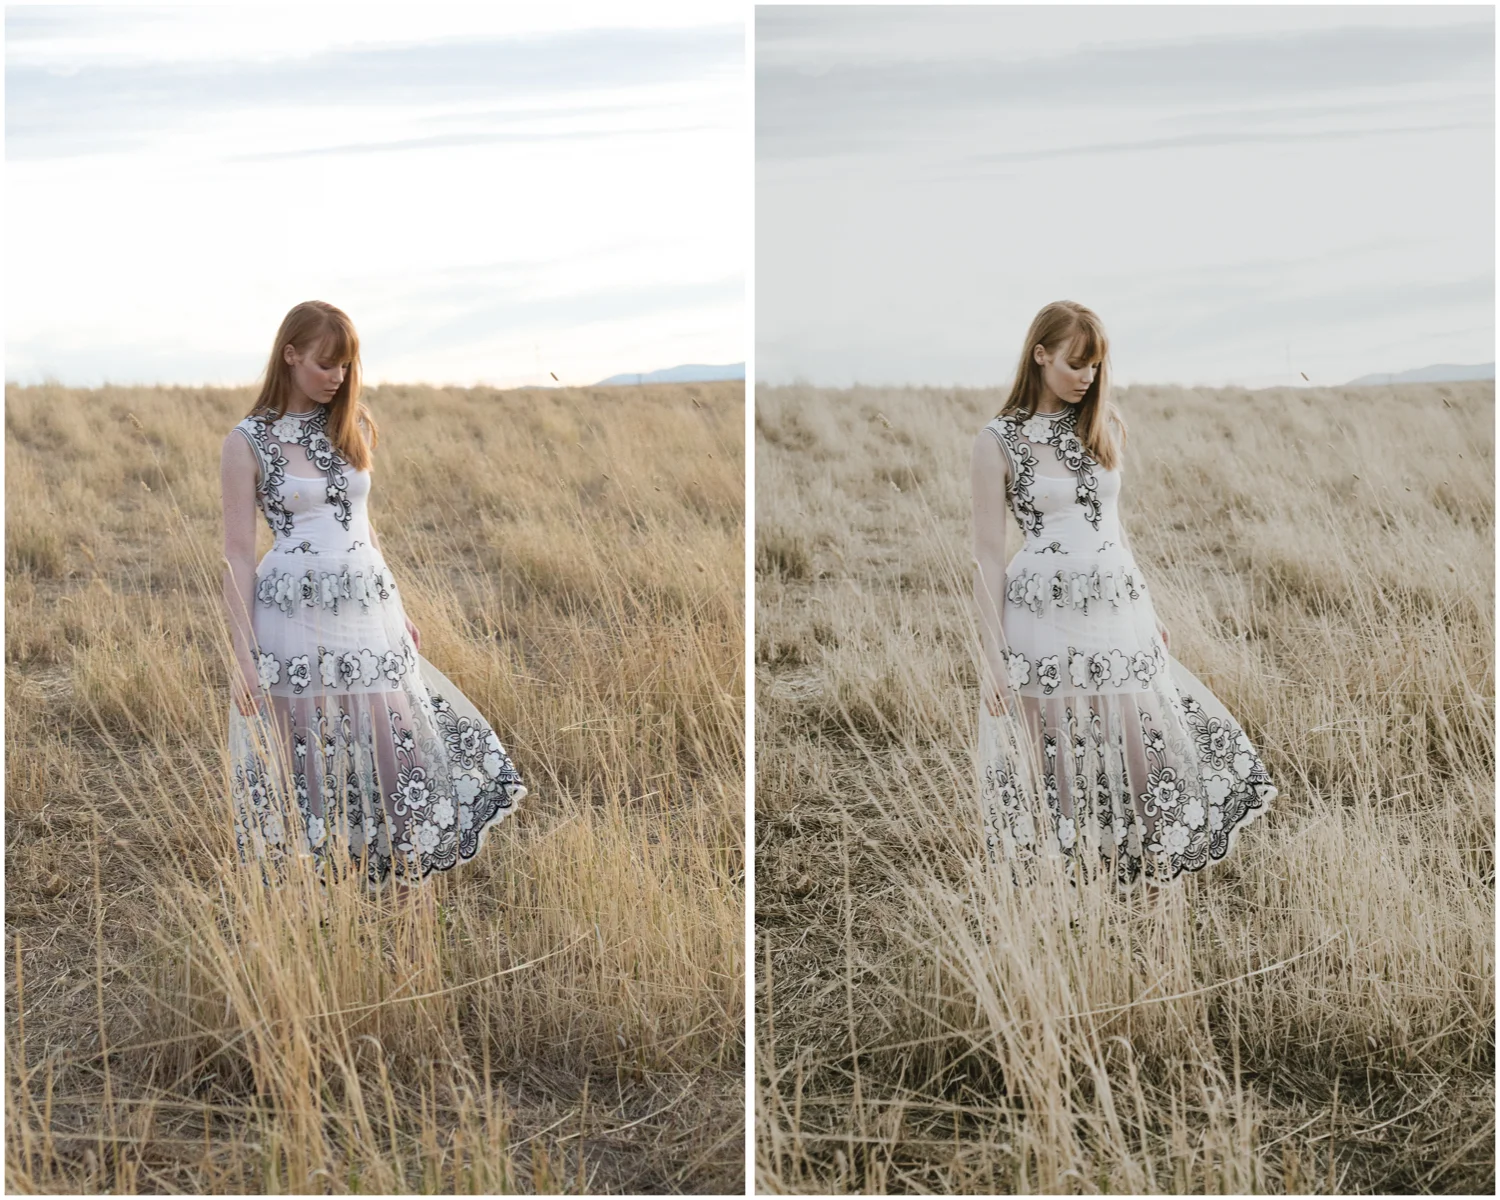
Colour balance and exposure properly adjusted on the left, Life//style preset applied to that on the right.
Life//style preset applied
EXAMPLE OF A POOR STARTING POINT

Raw image on the left: Colour balance far too green than what I intended, Lifestyle preset applied with less than ideal result.
There is no right or wrong colour balance or exposure, of course. Only the right colour balance INTENDED FOR THE IMAGE, and for the mood you are trying to create. And that's what makes the best starting point for the image before applying the preset.
The images below were taken at twilight- the image is dark/low key. That to me is what it looked like and what I want to start with before applying the preset. IT ALL DEPENDS ON THE STORY YOU WANT TO TELL.
Low key image- RAW
Modern Mellow Lightroom Preset
If you want to go for a day time lighter mood, you could make the adjustments easily.
Low key image edited with A6 preset
PLUS (+) AND MINUS (-) VERSIONS
My colour presets all come with + and - versions (some have double minus and double plus), which refers to the different 'strengths' of the preset - the degree that you want the preset style to alter your initial image.

The different versions in my preset list, representing different strengths of the stylistic elements in the preset. Subtle edits are the minus (-), more dramatic edits are the plus (+) versions.
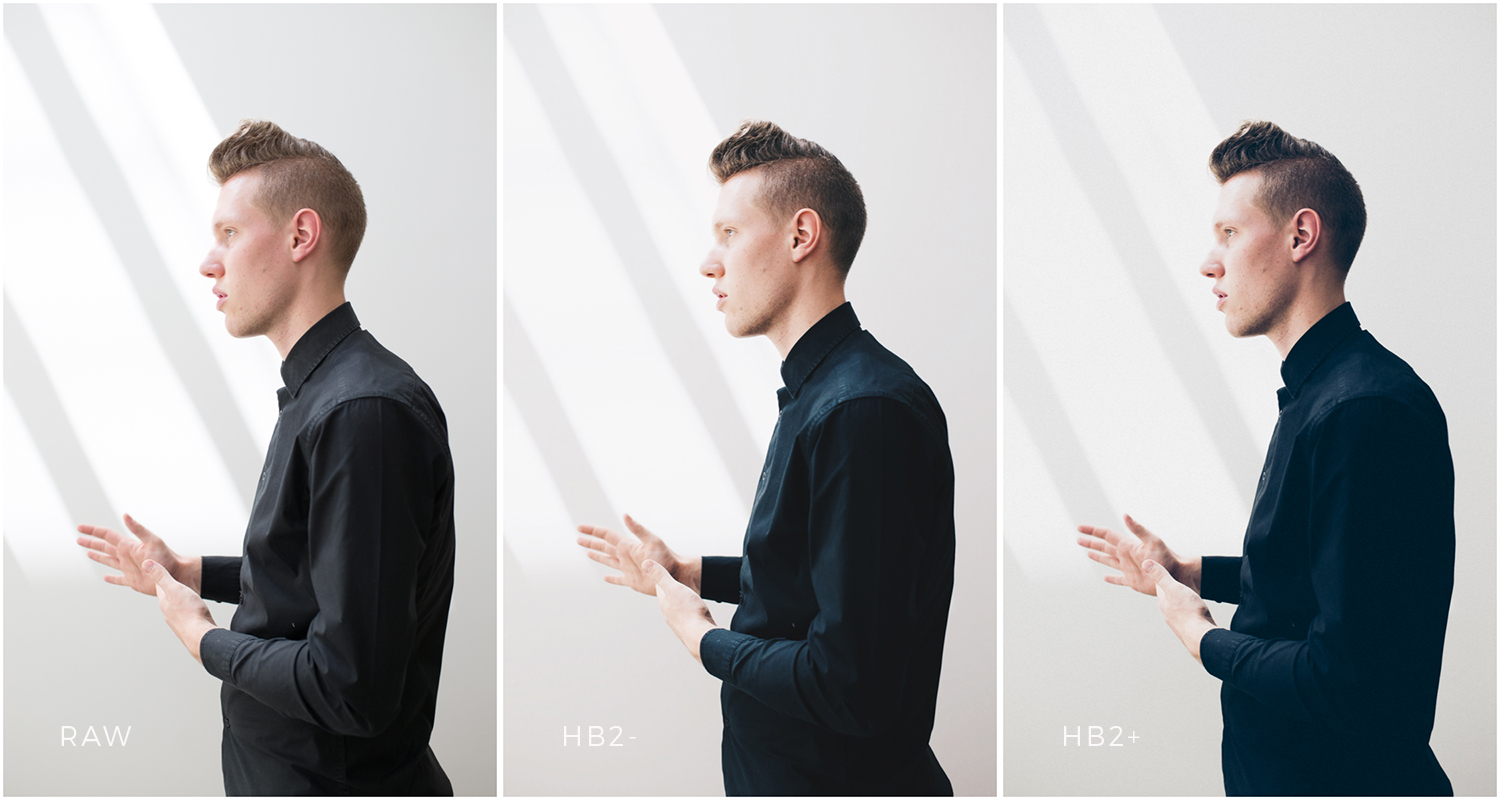
HB 2 PRESET
MODERN // MELLOW PRESET
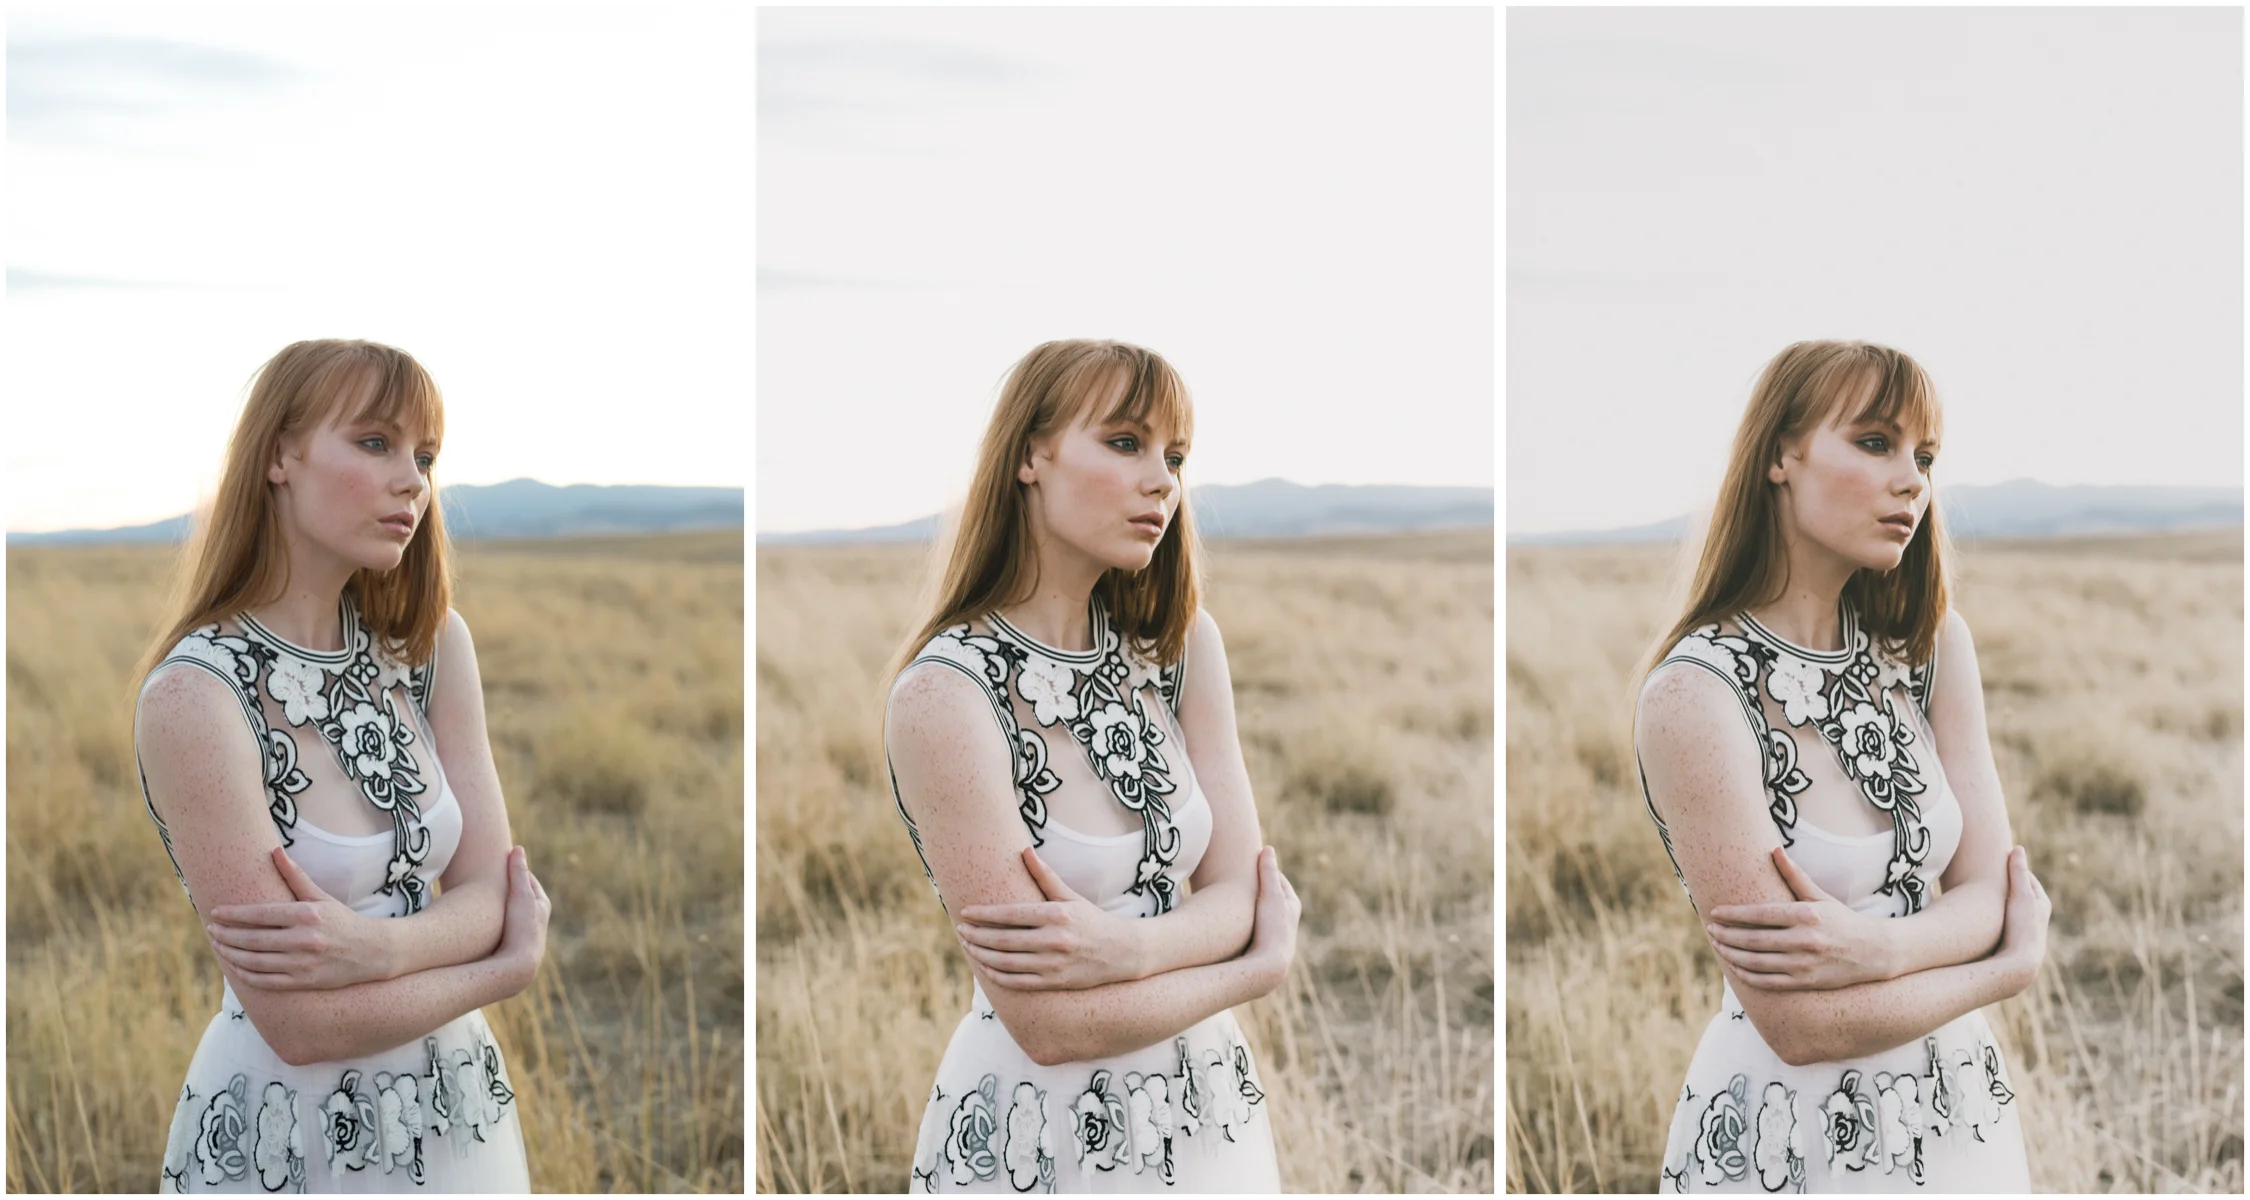
RAW (left) Modern// Mellow- (middle), Modern//Mellow (right)
Click on my next blog post about customizing the edits in a preset!
My presets can be found on my StraightNoChaserPix store on Etsy.