Street Etiquette SE3 / Street style- how to emulate in Lightroom

Note: my SE3 preset has been renamed STREET STYLE due to copyright issues with the use of the name VSCO inspired. More in this blog post.
"Embodying the look and feel of Street Etiquette's work and inspiration, this pack accentuates dark and gritty tones, as well as deep and bold colors that are fitting for an array of occasions."
Street etiquette x VSCO pack consists of 3 presets. SE1 and SE2 have more dramatic colour shifts, faded shadows, and have a strong 'instant film' look.
SE3 has a high contrast dynamic look with deep blacks, slight desaturation, and clean highlights which looks great with both darker scenes and bright high key images. I think it works well for fashion, street photography, and lifestyle images.
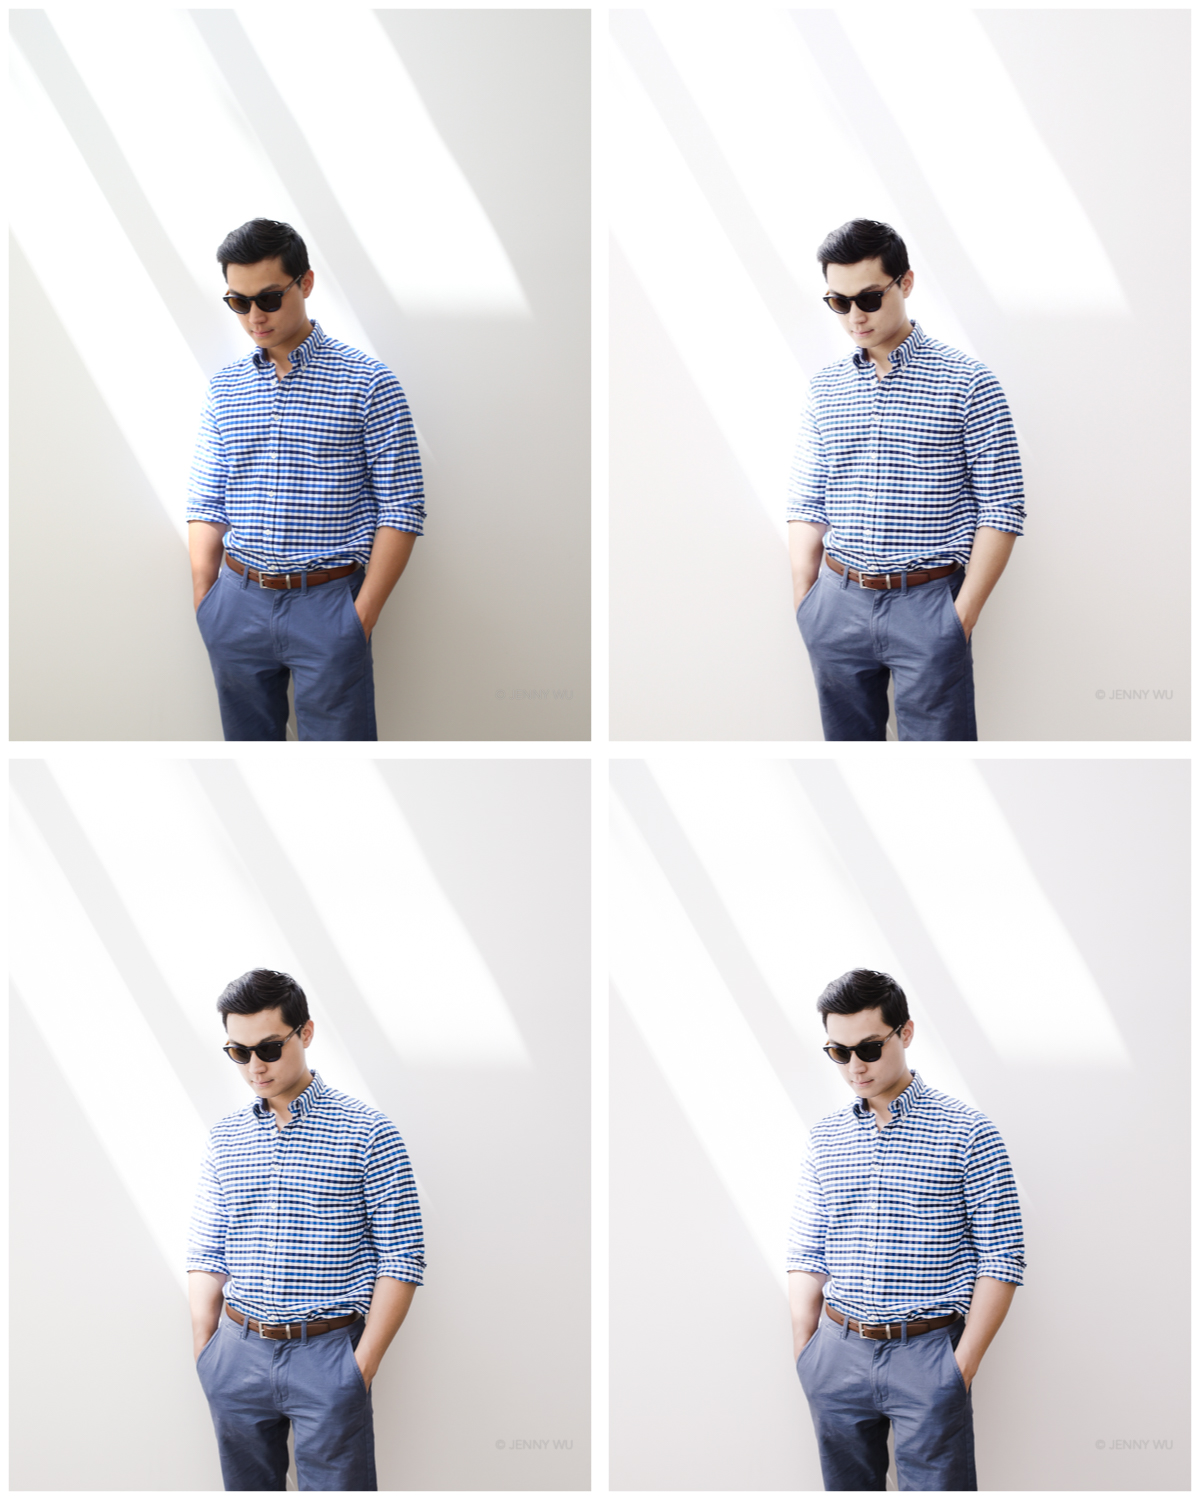
Santiago streets. Unedited jpeg (top left), VSCO Cam SE3 mobile edit (top right), Lightroom SE3 preset (bottom left), SE3+ (bottom right)

VSCO Cam SE3 qualities:
High contrast, especially in the mid tones and shadows. In Lightroom I have my contrast slider at + 35 and also pulled down the dark midtones in the tone curve (while keeping the brights untouched)
Overall desaturation as well as further desaturation in the reds and yellows. In Lightroom I have the Vibrance and Desaturation around - 24, and in the HSL panel I've selectively reduced the saturation of reds and oranges.
Colour shifts seen in the VSCO Cam SE3 edit include reds going into a warmer mellow rust colour and greens going to a muted yellow based olive. This is achieved in Lightroom by shifting the reds, oranges, and greens in the hue sliders towards orange, yellow, and yellow green respectively.
Subtle mellow caramel tones in the dark midtones and a sometimes just perceptible mauve in the highlight. I get this via adding those respective colours in the split toning panel. The purplish blue highlight in the split tone is there to cancel out the warmer shadows to create clean highlights.
SE3 inspired Lightroom edit is available for download at my preset shop.

Looking over Santiago city. Unedited jpeg (top left), VSCO Cam SE3 mobile edit (top right), Lightroom SE3 edit (bottom)


unedited (left), Lightroom SE3 edit (right)

The Andes. unedited jpeg (top), Lightroom SE3 edit (bottom)
Unedited (left), Lightroom Preset SE3+ (right)

Lightroom SE3+ Preset
Comparisons: Unedited (left), SE3 Lightroom Preset (right)

Comparison portrait edits (from top): Unedited, VSCOCam SE3-, SE3

In the VSCO Cam app, you can select the 'strength' of the edit, from 0 (no edit visible) to 12 - which gives you the most dramatic edit. Some images look great at 12, but some look best with a more subtle edit- particularly images that are meant to be viewed at larger dimensions (e.g. outside of instagram), and portraits.
I think it's a great option to have this option and have taken it across to my Lightroom presets. There are 3 options (as I have done in the past with previous VSCO Cam inspired presets): SE3- (a subtle edit, something like 3 on the VSCO Cam scale), SE3, SE3+ (you can think of this as the 12 on the VSCO Cam app dial)